
Silky smooth surfaces are the dream of and a point of pride for many 3D printing enthusiasts. Not only do they make your prints look much better and cut down on the time you will spend on post-processing, but they are also a good indicator that your 3D printer is performing at its best.
But, because of one thing or another, some setups refuse to give good results when it comes to surfaces. Luckily, like many other things in 3D printing, there are countless ways to solve this issue or make the results much better.
Things to Consider
Before setting out to get smoother 3D prints, you should probably make sure that you have nothing wrong with your 3D printer. So before even attempting our tips on getting smoother surfaces, you should ensure that you have done proper maintenance on your 3D printer. This also includes cleaning your device occasionally and calibrating your 3D printer. Even if everything is in order, the problem you are experiencing might not be a surface issue, but just a failed print that you can troubleshoot.
In this case, we recommend following this guide: Common 3D Printing Problems and How to Troubleshoot Them
How to Achieve Smooth Surfaces for Your 3D Prints
There are so many different factors at play when you are 3D printing that pinpointing the problem, if there is any, might be hard. But every step that we mention here will contribute to making your prints better in general, fixing the surface issues with them.

Decrease Layer Height
The most obvious step would be decreasing the layer height. If you are using an FDM 3D printer and you are not happy with the surfaces of your 3D prints, you are probably not happy with the horizontal lines that all FDM prints inevitably have. To minimize the number of lines on your prints and make them less noticeable, keeping the layer height as low as possible seems to be a reliable solution for most 3D printer users.
Other than layer lines, lowering the layer height makes the details on your print much better and is known to solve a plethora of other 3D printing problems. So if you want a better surface and a better print overall, lowering layer height is one of the best things you can do.

Print Slower
When using 3D printers, we always have to make a choice between speed and quality. There are exceptions of course, as printing too slowly might come with its own problems. But generally, the quality of your print can always be improved just by decreasing the printing speed.
Printing at a slower rate will improve layer adhesion, prevent problems like overhangs, and decrease the power of vibrations your device causes, improving the surface of your print in the process. So if you are already printing with a relatively low layer height, decreasing the printing speed would be the most logical next step to achieve better surfaces.

Check Flow Rate
Flow rate dictates how much filament your extruder will extrude while printing. Most 3D printers and slicers will have the flow rate set on a default setting, but that doesn’t mean that setting is the right one for your specific setup. Under-extrusion or over-extrusion can cause layer separation, bubbling, and a long list of other 3D printing problems.
Finding the perfect flow rate can be tricky. The slicer you use will likely come with a slider that allows you to change it. The default setting will be set to 100% and to find the perfect one for your setup, you can change it by increments of 5% until you start seeing improvements.
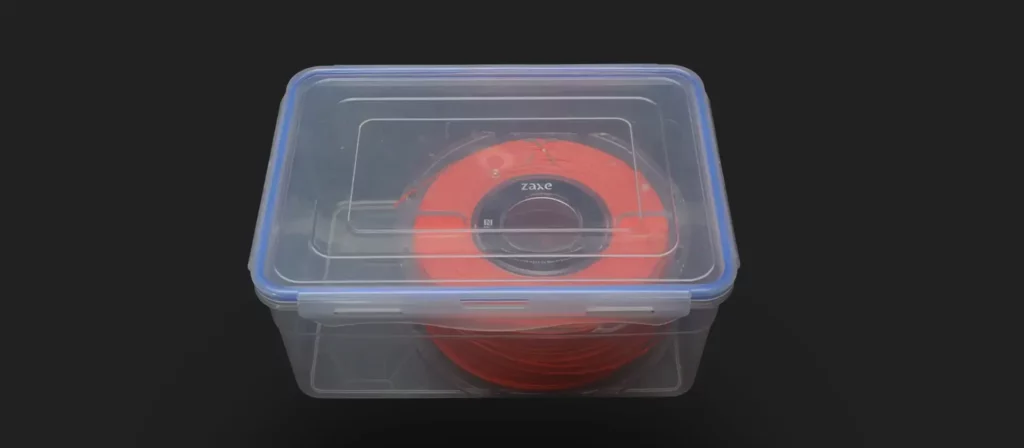
Ensure Filament Quality
We have only mentioned slicer and device settings so far, but the problem might not be related to either of those things. The quality of the filament will also play a big role during the printing process. That’s why spending a bit more on reliable brands when buying filaments is always a good idea. Even if the filament that you have bought is initially good, spools of filament that have gone bad for one reason or another are known to cause a number of problems in your prints. This includes things like, oozing, stringing, and bubbling.
Dust, humidity, and heat can be detrimental to your filaments. Especially for filaments like Nylon, which absorb moisture in the air quickly and need to be dried before being used in a print. To prevent this issue, storing your filaments under optimal conditions will also help.
To learn more about storing filaments: How to Store Your 3D Printer Filaments Properly

Find the Optimal Extruder Temperature
When working with thermoplastic, heat will directly affect the quality of the work you put out. There are so many temperatures at play that determines how good the performance of your device will be like the hotend temperature, table temperature, or how hot the printing area is. To get the smoothest surface you can get, all these elements need to be calibrated according to your needs.
The first one you need to get in order, and the one that affects your prints the most is the extruder temperature. Like with the flow rate, your slicer will probably have a default setting that changes depending on the filament type you use. But this setting doesn’t take room temperature, filament color, or other settings into consideration. That’s why trying different temperatures and seeing which one performs the best is the smartest thing to do. A temperature tower can help you find the perfect temperature in just a couple of hours.
For other test prints that can help you with optimizing settings, read: Essential Test Prints to Help Calibrate Your 3D Printer
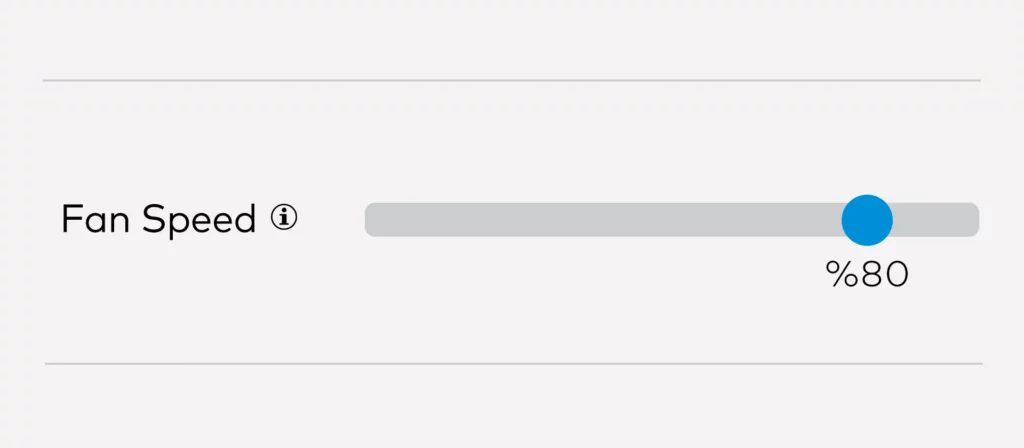
Change the Fan Speeds
The rate at which your print cools down and solidifies also can have an effect on your print’s surface quality. After all, if your print cools down way too fast, it can have a negative impact on the dimensional accuracy and layer adhesion of 3D-printed parts. Like with other settings, there is a sweet spot for your fan speeds that can improve the smoothness of print surfaces.
If the fan speeds are too low, it gets too hot and your extruder will start oozing, if it is too high, your prints will cool down too quickly and start shrinking. The perfect fan speed will depend mostly on the material you are using at the moment. For filaments that interact well with heat like ABS and PET-G, we usually print between the 50-60% range. But for a material like PLA, which needs a cooler environment to perform at its very best, a fan speed of 100% is recommended.
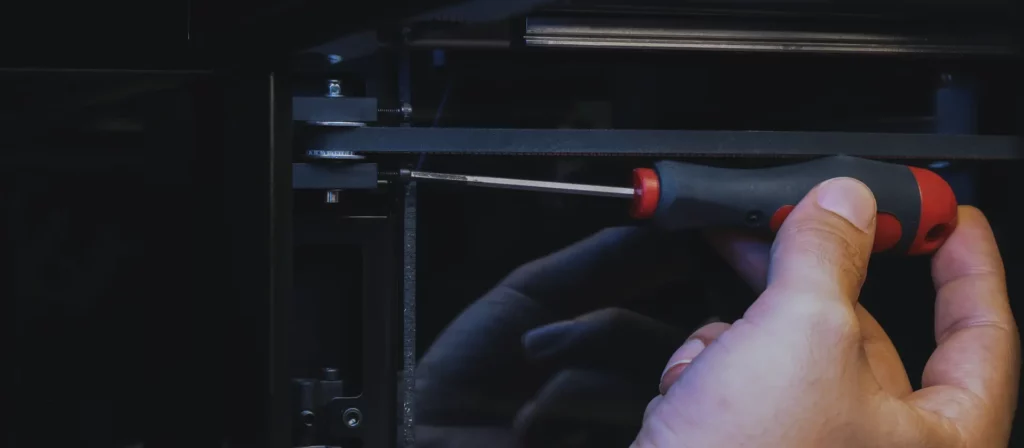
Check the Belt Tension
Belt tension is another factor that is directly related to the dimensional accuracy and surface quality of 3D prints. Belts affect how your printhead moves in the X and Y axis and optimal belt tension is essential to get the best performance out of your 3D printer. If the belts are too loose, this might cause problems like layer shifting and ghosting, which ruins surface smoothness.
When adjusting belt tension, we have a very good example that we give to our customers at Zaxe 3D to find the perfect range. Your belts shouldn’t be so loose that you can see a visible sag on them, but not too tight that they do not move when you pluck them. If your belt tension is somewhere in between, you probably won’t be experiencing any problems.
Conclusion
You will never achieve perfectly smooth surfaces with FDM 3D printers unless you do post-processing on your printed parts but that is not possible with every material. Layer lines are a reality of FDM 3D printing, but there are countless things you can do to improve them and make the lines less visible.
If you follow all or most of these suggestions, the surfaces of your prints will improve to a considerable degree. It is not always about solving a problem but sometimes you need to optimize the settings you work with to improve your results.